Tips for kinaesthetic learners

This is the last post in a three-part series, where we explore study techniques for the three main learning styles. If you aren’t sure what your unique learning style is, click here to find out. If you are a visual learner, click here for study techniques to suit that learning style. And if you are an auditory learner, click here.

So you’ve done the quiz and you’ve figured out that you have a kinaesthetic learning style.

To recap: People with a kinaesthetic learning style learn best when they are able to manipulate, engage with or actually do the thing that they’re learning about. If you find that you’re unable to fully grasp content unless you can touch and explore it, then you’re probably a kinaesthetic learner.

Here are some study techniques that you could try. These techniques help kinaesthetic learners to make sense of content and concepts by making sure that your brain engages with information in a way that it can process.

Do something while you study

Because you are easily distracted, it’s a good idea to do something while you’re studying. Fidget spinners are the latest trend but a good old-fashioned stress ball or simple elastic band will also do the trick. You could also take your notes to the gym, and try to get some studying in while you’re walking on the treadmill. You could also just pace up-and-down wherever you are studying.

The point is that your attention needs to be on your study notes, so calm your inner fidget by giving it something to do while your brain focuses on the important stuff!

Practise HIST (High Intensity Study Intervals)

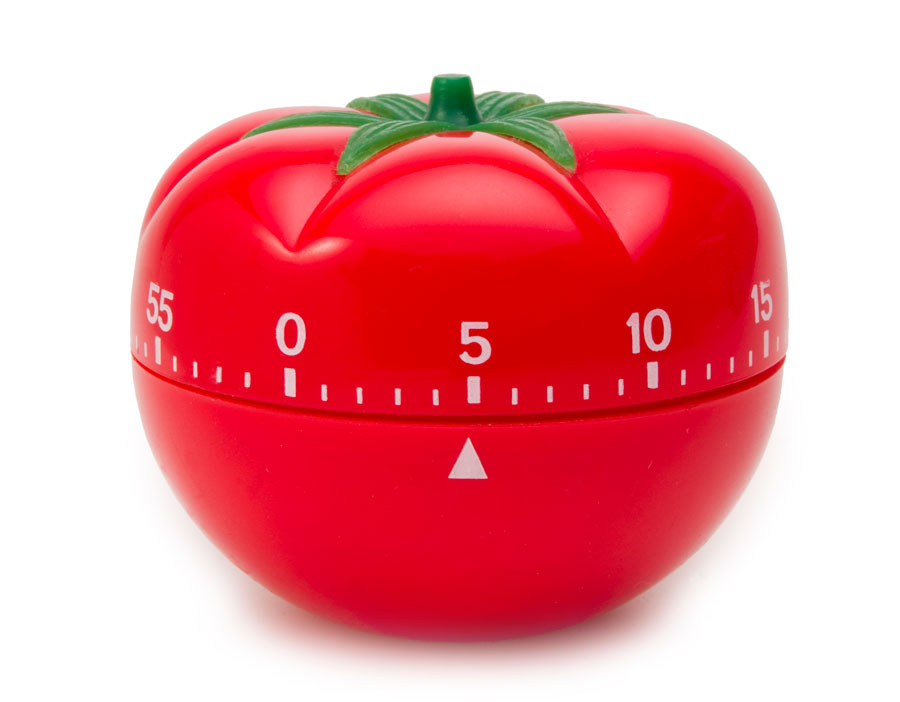
Because you are easily distracted, it’s no use trying to get a straight four hours of studying in. You will only end up frustrated. Rather study in short but effective bursts. This gives you an opportunity to focus on the task at hand, knowing that a 5-10 minute break is coming up.

Set a timer for 25 minutes and use the 25 minutes to give your revision all of your energy and attention. Once the buzzer goes, set another timer for 5-10 minutes (no longer!). Use this time to do whatever you like – make a sandwich, make a call or take a quick swim. Then go back and do another round. Do this until you’ve hit your study target for the day.

Prepare a presentation

Pretend that you are the only person in your class that has received the study notes. It is your responsibility to teach the content and skills to the rest of your class. Prepare a presentation on what they need to know. Use any presentation aids that you choose: PowerPoint, flipcharts, flash cards, etc. The act of putting the presentation together will help to solidify the content in your mind.

Take a look at this post: Tips for auditory learners, where we discuss putting together a study club. A study club is the perfect audience for a presentation like this. And, best of all, you’ll be helping learners with different learning styles (like an auditory learning style) at the same time too!

Watch videos and tutorials online

Long written descriptions will probably bore you, and you will end up not fully grasping complex content and concepts. Use YouTube and other reputable educational websites to find explanatory videos. This will go a long way to helping you decode the content.

It is also a good idea to look for online tutorials on DIY projects. This method won’t necessarily suit all of your subjects but you may be surprised how many fun and interesting projects there are online to help you with your learning. An example might be to build a DNA model to help you understand the helix structure (Life Sciences).

Here is a good example of this type of project: http://www.wikihow.com/Make-a-Model-of-DNA-Using-Common-Materials

(We have a full post on study techniques using technology coming up on the blog so look out for that.)

Use rhythm and rhyme

(This study technique is also suitable for auditory learners.)

Mnemonics (pronounced ni-mon-iks) are a great way to remember lists of facts or information, and are ideal for kinaesthetic learners because the act of making something up yourself often makes it easier to remember. Have fun making up your own mnemonics to remember certain facts.

For example, a good way to remember the three main learning styles might be to remember this rhyme: Vuyo Kicks Ants. (V = visual, K = kinaesthetic, A = auditory)

TIP: Try not to depend on mnemonics too much as a study technique, as you may end up forgetting which mnemonic to use!

How to use your Ace it! study guide

Hopefully this post has given you some good ideas about study techniques to use when you’re a kinaesthetic learner. Don’t forget that the Ace it! study guides have all the content you need to know for your exams.

Here’s how a kinaesthetic learner can use the Ace it! study guides to their best advantage:

  • Use the practice exam questions. Practice exams are a great tool for kinaesthetic learners.
  • Prepare your own quiz based on the content in the study guide.
  • Use sticky notes to remember which mnemonic to use for which section. And sing/chant your mnemonic out loud with actions and clapping for maximum impact!

Tips for auditory learners

This is the second post in a three-part series, where we explore study techniques for the three main learning styles. If you aren’t sure what your unique learning style is, click here to find out. If you are a visual learner, click here for study techniques to suit that learning style.

So you’ve done the quiz (or read the previous blog post about different learning styles) and you’ve figured out that you have a visual learning style.

To recap: People with a visual learning style learn best when they can see what they are trying to learn. If your notes are colourful and you like to doodle in the margins, then you’re probably a visual learner.

Here are some study techniques that you could try. These techniques help visual learners to make sense of content and concepts by forming ‘pictures’ that your mind can then file away, ready to be whipped out when you need it most: in a test or exam.

Take notes in class

This might sound obvious but it’s an old school way to make sure that you remember what you’ve learnt in class. Too many people try to simply listen to what the teacher is saying, and then find that they can’t remember anything as soon as the class is over!

As a visual learner, you may also find your thoughts drifting if you try to listen without taking any notes… Taking notes is a skill: Don’t think that trying to write down every word that the teacher is saying is going to help you either. You’ll lose track and end up missing something if you try to do that.

There are five main note-taking techniques that you can use during a class:

  1. The Cornell Method: Divide your page into two columns. In the right-hand column, write down the concepts being taught. In the left-hand column, write down questions or cues relating to the content. This forces you to engage with the subject matter.
  2. Outlining method: Use bullet points or indenting to show the main themes, and then the sub-themes under each main theme.
  3. Flow method: This is a freestyle method where you simply take notes in whatever format feels best to you at the time. You can use arrows, stars and pictures in this method to connect ideas and concepts.

Here are two excellent YouTube videos about note-taking skills. The first explains the three main methods, and how to use them, and the second shows you how to make your notes colourful and exciting to look at and use (perfect for visual learners!):

TIP: If your teacher doesn’t approve of note-taking during class (we all have a teacher who says “You don’t need to write, it’s all in the hand out”), try speaking to him or her about it after class one day. Show your teacher the kind of notes that you would like to take, and explain that you think that you’ll be able to grasp the content much better if you’re allowed to write notes during the class. If your teacher is still unsure, then try to write as many notes as possible in the time between classes or straight after school.

Mind maps

There’s nothing new about mind maps. It’s a study technique that’s been around for ages, and you’ve probably seen them before. Perhaps a teacher or adult has even tried to teach you how they create mind maps. Whether you’re a mind map expert or a mind map novice, this much is true: Mind maps are a visual learner’s best friends.

The trick with mind maps is to only include the most important information (so don’t try to include everything in your History textbook). Mind maps should be as colourful (or not) as you want them to be. Use highlighters, different colour pens, wax crayons, pencil crayons and sticky notes to really make them stand out. You can also use pictures to really solidify concepts or ideas in your mind – either draw them yourself, or cut-and-paste pictures and articles from newspapers, magazines and the Internet.

If you’re worried about running out of space, try to get hold of A3 sheets of paper. You can even use sticky-tape to make a bigger sheet of paper from four A4 sheets.

(We have a full post on creating mind maps coming up on the blog so look out for that.)

Look for pictures, demos or videos in the library and online

Are you excited when you turn a page of your textbook in the middle of a complicated section and see an annotated diagram because, finally, you’ll be able to understand what all those explanations are about? It’s pretty obvious that if you’re a visual learner you’ll need to actually see something before you fully understand it.

Unfortunately, you may not always have a picture, photograph or video in your textbook or learning materials to explain everything. And, even if there are pictures, they may not be clear enough for you to really get it.

This is where the Internet and your school’s library will come in handy. You’ll be able to find illustrations and photographs, and even videos in some cases, for almost anything.

So when your textbook describes a Blue Crane as a tall, ground-dwelling bird that is about 120 cm tall with a wingspan of about 200 cm, look it up! You’ll get a much better idea of what a Blue Crane is when you actually see a picture of it. Better yet, search for a video on YouTube, where you can see the Blue Crane walk and hear its call.

Just be careful while you’re online – be smart and stay safe. And only trust reputable websites because not everything on the Internet is true.

(We have a full post on study techniques using technology coming up on the blog so look out for that.)

How to use your Ace it! study guide

Hopefully this post has given you some good ideas about study techniques to use when you’re a visual learner. Don’t forget that the Ace it! study guides have all the content you need to know for your exams.

Here’s how a visual learner can use the Ace it! study guides to their best advantage:

  • Use highlighters to highlight key concepts.
  • Take notes in the margins.
  • Use sticky notes to mark off sections, or to write notes for yourself.
  • Ace it! study guides are logically organised and broken into sections. Translate each section into mind maps or charts to revise what you need to know.

If you’re an auditory learner, then look out for our next blog post.


Tips for visual learners

This is the first post in a three-part series, where we explore study techniques for the three main learning styles. If you aren’t sure what your unique learning style is, click here to find out.

So you’ve done the quiz (or read the previous blog post about different learning styles) and you’ve figured out that you have a visual learning style.

To recap: People with a visual learning style learn best when they can see what they are trying to learn. If your notes are colourful and you like to doodle in the margins, then you’re probably a visual learner.

Here are some study techniques that you could try. These techniques help visual learners to make sense of content and concepts by forming ‘pictures’ that your mind can then file away, ready to be whipped out when you need it most: in a test or exam.

Take notes in class

This might sound obvious but it’s an old school way to make sure that you remember what you’ve learnt in class. Too many people try to simply listen to what the teacher is saying, and then find that they can’t remember anything as soon as the class is over!

As a visual learner, you may also find your thoughts drifting if you try to listen without taking any notes… Taking notes is a skill: Don’t think that trying to write down every word that the teacher is saying is going to help you either. You’ll lose track and end up missing something if you try to do that.

There are five main note-taking techniques that you can use during a class:

  1. The Cornell Method: Divide your page into two columns. In the right-hand column, write down the concepts being taught. In the left-hand column, write down questions or cues relating to the content. This forces you to engage with the subject matter.
  2. Outlining method: Use bullet points or indenting to show the main themes, and then the sub-themes under each main theme.
  3. Flow method: This is a freestyle method where you simply take notes in whatever format feels best to you at the time. You can use arrows, stars and pictures in this method to connect ideas and concepts.

Here are two excellent YouTube videos about note-taking skills. The first explains the three main methods, and how to use them, and the second shows you how to make your notes colourful and exciting to look at and use (perfect for visual learners!):

https://youtu.be/sJCVeV2eIzU

TIP: If your teacher doesn’t approve of note-taking during class (we all have a teacher who says “You don’t need to write, it’s all in the hand out”), try speaking to him or her about it after class one day. Show your teacher the kind of notes that you would like to take, and explain that you think that you’ll be able to grasp the content much better if you’re allowed to write notes during the class. If your teacher is still unsure, then try to write as many notes as possible in the time between classes or straight after school.

Mind maps

There’s nothing new about mind maps. It’s a study technique that’s been around for ages, and you’ve probably seen them before. Perhaps a teacher or adult has even tried to teach you how they create mind maps. Whether you’re a mind map expert or a mind map novice, this much is true: Mind maps are a visual learner’s best friends.

The trick with mind maps is to only include the most important information (so don’t try to include everything in your History textbook). Mind maps should be as colourful (or not) as you want them to be. Use highlighters, different colour pens, wax crayons, pencil crayons and sticky notes to really make them stand out. You can also use pictures to really solidify concepts or ideas in your mind – either draw them yourself, or cut-and-paste pictures and articles from newspapers, magazines and the Internet.

If you’re worried about running out of space, try to get hold of A3 sheets of paper. You can even use sticky-tape to make a bigger sheet of paper from four A4 sheets.

(We have a full post on creating mind maps coming up on the blog so look out for that.)

Look for pictures, demos or videos in the library and online

Are you excited when you turn a page of your textbook in the middle of a complicated section and see an annotated diagram because, finally, you’ll be able to understand what all those explanations are about? It’s pretty obvious that if you’re a visual learner you’ll need to actually see something before you fully understand it.

Unfortunately, you may not always have a picture, photograph or video in your textbook or learning materials to explain everything. And, even if there are pictures, they may not be clear enough for you to really get it.

This is where the Internet and your school’s library will come in handy. You’ll be able to find illustrations and photographs, and even videos in some cases, for almost anything.

So when your textbook describes a Blue Crane as a tall, ground-dwelling bird that is about 120 cm tall with a wingspan of about 200 cm, look it up! You’ll get a much better idea of what a Blue Crane is when you actually see a picture of it. Better yet, search for a video on YouTube, where you can see the Blue Crane walk and hear its call.

Just be careful while you’re online – be smart and stay safe. And only trust reputable websites because not everything on the Internet is true.

(We have a full post on study techniques using technology coming up on the blog so look out for that.)

How to use your Ace it! study guide

Hopefully this post has given you some good ideas about study techniques to use when you’re a visual learner. Don’t forget that the Ace it! study guides have all the content you need to know for your exams.

Here’s how a visual learner can use the Ace it! study guides to their best advantage:

  • Use highlighters to highlight key concepts.
  • Take notes in the margins.
  • Use sticky notes to mark off sections, or to write notes for yourself.
  • Ace it! study guides are logically organised and broken into sections. Translate each section into mind maps or charts to revise what you need to know.

If you’re an auditory learner, then look out for our next blog post.