Work hard, play hard

Your studies should be a top priority for you but there’s one priority that is more important – and it will be the most important priority throughout your life: You!

In this blog post, we explore the importance of having a good balance between studying and relaxing and how to juggle everything you have going on in your life effectively. In a previous blog post, we wrote about how to set up a study timetable for your exam revision. In that post, we discussed setting aside time for relaxation and socialising, as well as time for exercising.

Stress is unavoidable. However, too much stress and stress over a long period of time can have a really negative effect on your health and wellbeing. It can also have a negative effect on your marks! Stress can make it difficult to concentrate, affect your sleep and it could lead to depression and anxiety.

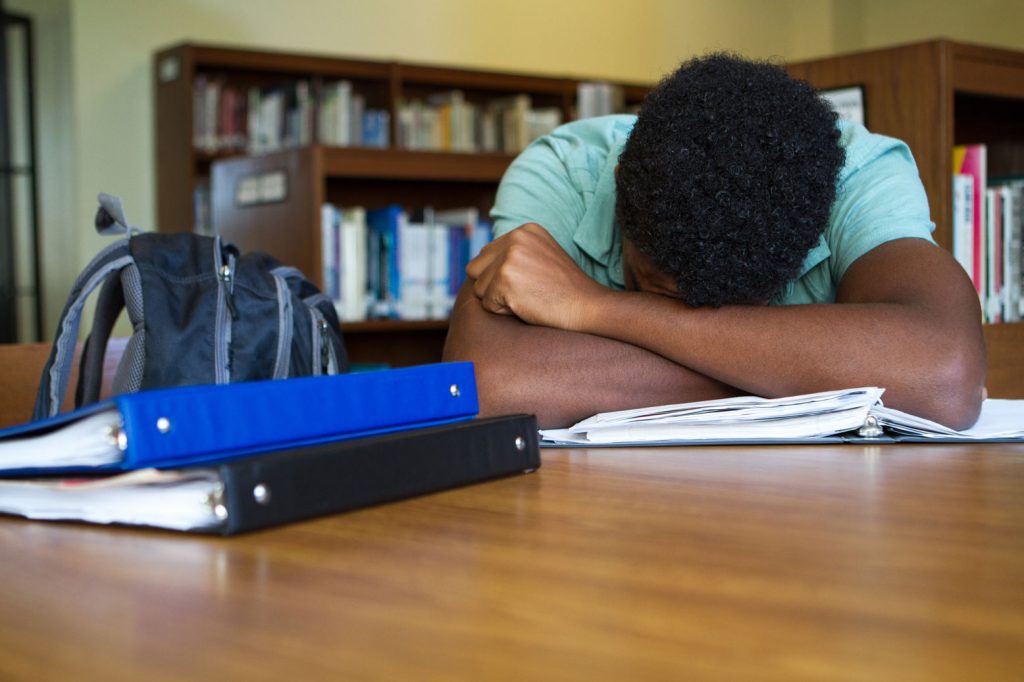
It’s very important that you learn how to balance your studies with fun and relaxation so that you can keep your mind and body in tip-top health.

Being able to manage your time so that you have a balanced life is a life skill that will serve you well long after high school.

Get some sleep

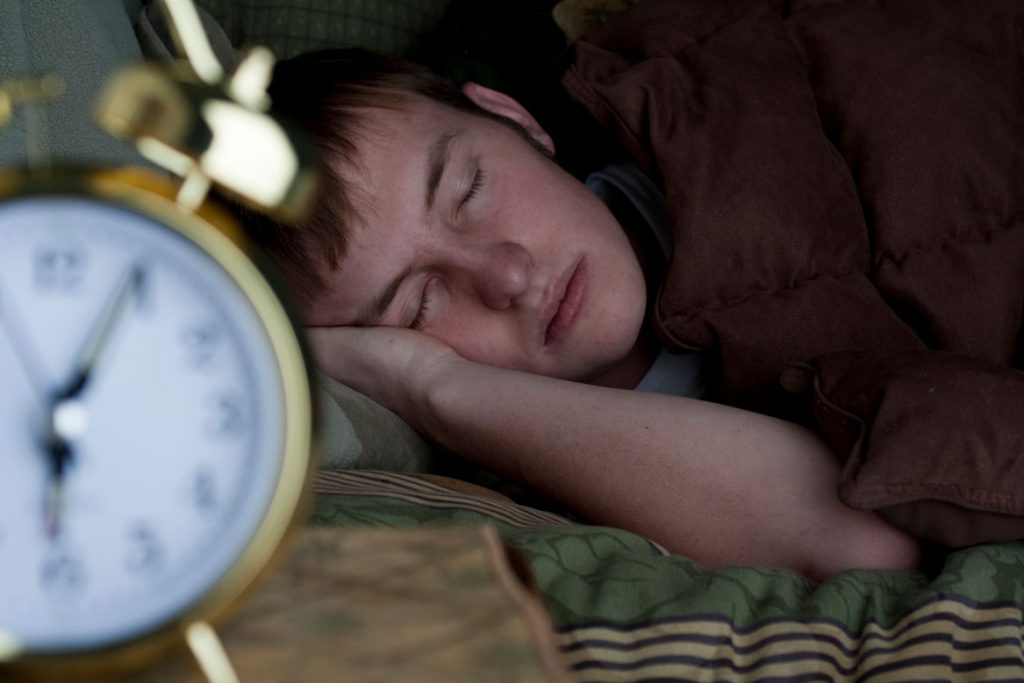
Start with the knowledge that a good night’s sleep is essential for optimal health. Sleep can also have a positive effect on your ability to study harder and remember what you’ve learnt. Don’t be tempted to skip sleep for too many nights in a row. A refreshed and relaxed mind is much better able to manage stress.

Teenagers need between 8 and 10 hours of sleep per night. You should try to go to sleep and wake up at the same time every night and morning.

TIP: If you are struggling to fall asleep, try cutting out caffeine (found in coffee, some teas and even chocolate). If you can’t sleep because you feel stressed, then try writing a to-do list for the next day before bed. This can help to put aside your anxiety for the evening because you know that you will deal with it in the morning.

Exercise – not only for your body, for your mind too

Not only is some form of daily exercise good for your health, it can also help to alleviate anxiety and stress. For many people, exercise is the first thing that gets cancelled when life gets busy. Try not to do this: it’s only 30 minutes to an hour out of your day. In fact, the break might make your studying more effective, and you’ll certainly feel better.

Find a type of exercise that you enjoy. It can be as simple as a 30-minute walk, or it can be an hour-long jog. If you have a gym membership, try out the different classes to see what you enjoy. Most gyms will have yoga classes if you prefer a slower pace, or you could do a fun dance/aerobics class like Zumba.

If you do an extramural sport at school or at a club, this absolutely counts towards your exercise quota for the week! Keep it up!
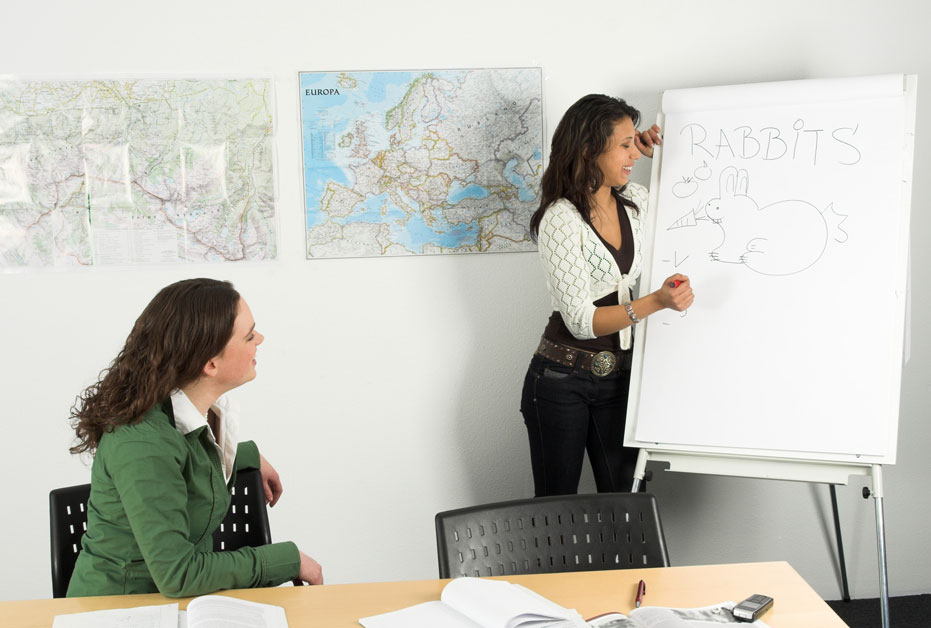
Socialise…

People who make time to be with their friends and family are generally healthier. Plan ‘dates’ with your parents, siblings or other family members, as well as your close friends. Try to plan activities that everyone will enjoy, such as seeing a movie, going for a long walk, going out for breakfast, etc.

Whatever you do, ensure that you put your phones away and focus on being together.

Spend time with people who make you feel good. It’s no use spending time with someone who drains your energy and makes you feel low.

…but also spend time alone

You also need to think of activities to do that you find relaxing and enjoyable, and that you can do quietly on your own. This is an excellent way to unwind. You could set aside an hour or two of uninterrupted time on a Sunday evening, for example, to relax and prepare yourself for the week ahead.

Some ideas include:

  • Reading a book (that isn’t a setwork!)
  • Reading your favourite magazine
  • Drawing/Writing/Painting
  • Watching your favourite movie
  • Cooking or baking
  • Giving yourself a manicure or pedicure
  • Meditating
  • Listening to a podcast that you enjoy

TIP: Try not to spend your alone time online (especially not on social media). Social media can cause a lot of negative emotions to surface. You should emerge from your alone time feeling refreshed and relaxed, not even more stressed out!

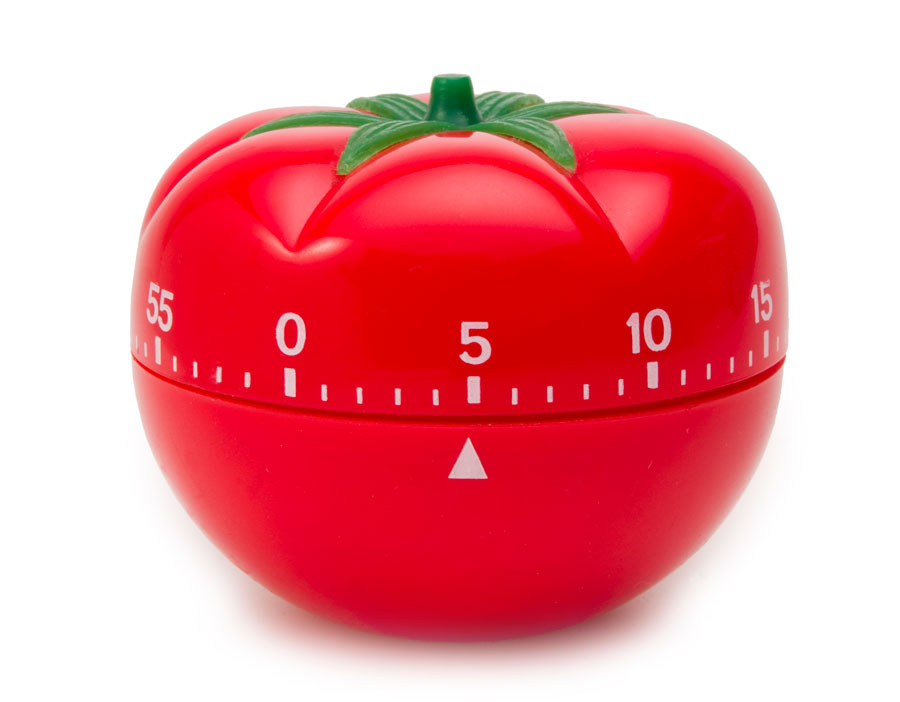
Of course, you do need to study too! Not doing the appropriate amount of revision will cause you more stress, so don’t put it off. There may be times when you aren’t able to schedule any time off for yourself. That’s fine for a short period of time (for example, if you have three assignments due in the same week or a very full exam week) but be sure to set aside a few days or a weekend to unwind once the crunch time is over.

Mind mapping

Of all of the different learning styles, the visual learning style is the best suited to traditional exam revision methods, such as mind mapping. Visual learners will respond well to these colourful summaries of the content. This is not to say that auditory learners and kinaesthetic learners shouldn’t use mind maps; they can actually be pretty effective for you too.

A bad mind map is useless and ineffective. It’s important to know how to develop them properly, or they’ll just be a waste of time and paper.

Here are some tips to help you learn how to mind map so that you don’t waste time or paper.

Firstly, gather your tools. You will need:

  • Sheets of plain paper (A3 if you can get it, otherwise A4 will do)
  • Black marker
  • Black pen
  • Different colour pens OR highlighters OR pencil crayons
  • Sticky notes

The most important thing to remember about mind mapping is that it is a way to see the main ideas/components of a section at a glance, and how those ideas are connected.

Start by reading through the section you want to summarise, and making a note of the main ideas.


Draw your mind map with these ideas in mind.

Now, read through the section again. For each of the main ideas, you should identify related ideas.

Using a black pen, jot these down on your mind map.

Now, set aside your textbook or notes and focus on what you know or remember about the content. Using different colours, make notes for yourself, write examples that illustrate the point, draw doodles that help to explain things and connect different ideas. You can also use sticky notes to add more examples or to test yourself.


Your mind map is now complete! If you are a visual learner, you can simply use your mind maps as visual reminders of the content. If you are an auditory learner or a kinaesthetic learner, use your mind map to explain the content to a friend or helpful parent or sibling.


Where to find music for studying

The word ‘auditory’ relates to the sense of hearing. We know that people have different learning styles and that people with an auditory learning style learn best through hearing. This means that you’re able to absorb information by listening to it – this works great in a classroom environment where your teacher is explaining the content.

The downside to being an auditory learner is that silence can be distracting! It is almost impossible for an auditory learner to absorb information by sitting in a silent room and reading notes.

Have a look at this blog post with study tips for auditory learners, including starting a study club and studying somewhere where you’re able to make a bit of noise.

If neither of those are options for you, then consider studying with music. Because you’re an auditory learner, you’re bound to be distracted by lyrics and complicated musical compositions so it’s important to find the right music to study to. Think background noise, rather than the main act at a concert.

With a good library of studying music, you can pop your headphones on in a quiet library or room and make it easier to focus. You could even experiment with reserving certain playlists for specific subjects: the familiar music might jog your memory the next time you pick up where you left off.

Here are some tips for choosing the right music to study to (as well as where to look):

  • Choose instrumental music, rather than music that contains vocals.
  • The music should verge on boring. In other words, if you would be unable to listen to the musical piece when you’re not studying, then it’s probably a good bet.
  • That said, you shouldn’t hate the music. Don’t choose something that is completely off-putting – it should make you feel relaxed, not on edge.
  • Classical music by maestros like Beethoven, Chopin, Mozart and Tchaikovsky are a good place to start. If you can’t bear these compositions and want something instrumental but modern, then try musical scores from movies by composers like Hans Zimmer and Thomas Newman.
  • Don’t play it too loud. The music should fade into the background, rather than dominate your thoughts.
  • If you find music distracting then try nature sounds such as the sound of the ocean, whale and dolphin calls, etc. The idea is for the music or the sound to provide white noise so that you aren’t distracted by silence. These nature sounds (often used for meditation) can be very calming and non-intrusive.

Try searching for ‘Study Music’, ‘Meditation Music’, ‘Meditation Sounds’, etc. on Apple Music or YouTube. If you’d prefer music scores, try Hans Zimmer, Thomas Newman, Danny Elfman, Howard Shore and Alexandre Desplat. These are the most famous movie score composers but there are plenty more. Find a few that you like and enjoy!

You’re well on your way to understanding your own unique learning style. Keep experimenting until you find what works for you and there’s no doubt that you’ll ace your exams!

Setting up a study timetable

When it comes to time management, there are three types of people:

  1. The procrastinator:

This person underestimates how much time they’ll need to study and so believes that they have plenty of time left. They’re usually cramming late into the night before the exam, and sometimes even just before the exam.

  1. The overachiever

This person does nothing but study. There’s no time for fun or relaxation. By the time the exams roll around, this person is so frazzled that it’s a miracle they can hold a pen, never mind answer questions with it.

  1. The disorganised

This poor soul tries their best but is so disorganised that they’re always underprepared. They’ll spend hours revising a section, only to discover that it’s not even examinable!

Recognise any of these types? They all have one thing in common: None of them know how to set up a study timetable.

A good study timetable will ensure that you are organised, prepared and even relaxed by the time you write your exam. Learning how to manage your time effectively is an important study skill and life skill.

  1. Choose your format

You may want to use an online calendar (for example Google Calendar) to do your planning, or you may prefer a good old-fashioned diary. You could also download and print this study timetable. Add colour and stickers and put it somewhere you can see it daily (like the fridge).

  1. Get your exam timetable

Your exam timetable should include details of the exam, for example the paper that you will be writing (i.e. English Paper 1 or Life Sciences Paper 2), the time of the exam and the venue. Fill in this information on your study timetable (include all of the specifics).

  1. Write down what you need to know

For every exam that you will be writing, jot down the sections that you will need to study. Remember to do this for every exam and not necessarily every subject. You will write more than one exam for some subjects and it’s important to know what each exam will be testing.

  1. Work backwards and plan your study sessions

This part will take a bit of time. In two or three-hour blocks, work backwards from each exam and write down the sections that you will need to study. Try not to do more than two or three study sessions per day. Also try not to plan to study a section the day before the exam. Rather block off some time to do some revision for that exam the day before. This will help you feel calmer and more in control.

  1. Now add the fun stuff

Now try to schedule in some recreational and relaxation activities. Start with family outings, birthdays, church gatherings, etc. and then add at least 30 minutes of exercise per day. Try to do something fun once a week, like see a movie with friends. Don’t try to do too much, as this will only make you feel more stressed.

Once you’re happy with your study timetable, and you’ve checked that it isn’t too demanding (or too relaxed!), make it as colourful or attractive as you like, put it somewhere you can see it and look at it every morning. If it’s electronic, set reminders and alarms so that you don’t forget to look at your to-do list for the day. Things may change and need shifting around sometimes but you should be disciplined enough to stick to your plan as much as possible.

Draw a line through every successful day so that you can see how far you’ve come. Before you know it, the exams will be over and you’ll have aced them!

How to ensure your child is using the Internet safely

Your first instinct as a parent is to protect your child from harm. While restricting your child’s screen time (and, most especially, their time on the Internet) makes perfect sense when your child is in pre-primary or primary school, it may not be that easy when they’re in high school.


For one thing, your child needs the Internet to do research. They may also be in a school that encourages the use of technology, including chat groups, social media, email and Internet research in class and at home.

The use of the Internet – including social media – can be a powerful educational tool for your child, especially if they have auditory learning style or a kinaesthetic learning style. In previous blog posts, we have included study tips that require the use of the Internet and, in a future blog post, we will give your child more information on how to use technology for this purpose.

But, first, let’s discuss how you can protect your child and ensure that they grow up to be responsible consumers of online media.

Don’t overestimate your child’s maturity

You have spent many years considering every aspect of your child’s upbringing and education. You worry about their table manners, their willingness to serve their community, their sportsmanship on the field… So why do so many parents neglect to teach their children basic Internet etiquette?

The Internet is a permanent feature in modern life. It’s your responsibility to teach your child some simple rules to ensure that they use it to their advantage in a responsible way. Just like you wouldn’t expect a one-year-old child to understand table manners, you cannot expect a 13-year-old to understand how to use the Internet responsibly without guidance.

Here are some points to discuss with your child:

  • Remember that what you post online becomes public, and is permanent. Think ahead and never post something that could compromise your reputation.
  • Never divulge personal details to anyone online. Personal details include your name, your address, your school, your parents’ names, your pets’ names, your birthday, any banking information or passwords and even what you look like.
  • Don’t use passwords that are too easy to figure out (i.e. passwords that use birthdays, parents’ names, surnames, pets’ names, etc.).

  • Ensure that all of your social media accounts are set to “Private” and that you carefully screen any friend or follow requests.
  • Never – under any circumstances – send a picture or video to anyone of any part of your body: naked or clothed.
  • Report abusive behaviour immediately. Online bullying is a serious problem and is just as, if not more, damaging than playground bullying.
  • On that note, don’t send nasty messages or post malicious rumours or half-truths about anyone online. This is unacceptable behaviour and can have tragic consequences.
  • Remember that what you see on social media is not an accurate reflection of someone’s life – it’s a carefully curated snapshot. Try not to compare yourself to the people you admire online. It’s much more important to live a full and happy life in the real world than to worry about your online persona!

It’s important for this to be an on-going conversation in your family. Allow your children to teach you about new and exciting technologies, apps and social media sites so that you are engaging with these and up-to-date with the latest trends. Build trust so that your child does not feel the need to hide anything from you. If you want to, you can insist that all Internet browsing is done in the family’s study, kitchen or lounge (in other words, no browsing allowed in bedrooms with closed doors).

Lastly, open an account on every platform that your child frequents (even if yours lies dormant) and insist that your child connect, friend, follow or link up with you on those platforms. However (and this is the hard part), resist the urge to snoop too much or too often.


Set all the settings

You have probably activated parental control on your television. Likewise, ensure that all of the Internet browsers at home (on every device) have safety settings activated. Go through the privacy and security settings with your child to check that their email accounts, social media accounts and cloud accounts have the appropriate settings activated.

Make sure that your WIFI at home is protected with a password and that you know how to change it. This can be an effective way to restrict Internet usage, if necessary.

Lastly, ensure that the devices and laptops owned and used by the adults in the house have all of these settings activated too. Resist the urge to allow your Internet browser to save your password for you, or for sites requiring log in details to ‘remember’ you. Make a habit of logging out of your accounts once you are done, and encourage your child to do the same.

Create a list of ‘approved’ sites

Work with your child to create and bookmark a list of ‘approved’ websites. These can include educational sites, YouTube channels and certain social media sites. If you or your child come across or hear about a new website and would like to add it to the list, check it out together and then make a decision.

The point is to teach your child how to be a discerning consumer of online media and information. There is a lot of information on the Internet and it’s not always clear what is true and what isn’t. Encourage your child to think critically about information and its source.

Here is a list to get you started:

www.facebook.com

www.twitter.com

www.wikipedia.org

www.ted.com

www.nationalgeographic.com

www.history.com

www.time.com

www.britannica.com

www.sahistory.org.za

YouTube channels worth checking out:

  • Study with Jess
  • CGP Grey
  • MinutePhysics
  • SciShow
  • Numberphile

(A note on Wikipedia: Even though there is evidence to suggest that the information on Wikipedia is reliable because it is crowd-sourced and, therefore, constantly updated and corrected, many teachers are opposed to learners using it as a source for their assignments and will mark them down if it’s cited in their bibliographies. However, your child can still use it to quickly check concepts and facts. They can use the sources cited in the footnotes to point them towards more ‘acceptable’ sources for assignments.)

Technology is more than the web – don’t forget about apps!

There are many applications (apps) available for both Apple and Android devices. Some apps are useful, most are harmless, but some are downright scary. Your child’s device should be linked to your credit card or email account so they should not be downloading apps without your knowledge.

There are many apps on the market that can be very useful for your child (and you), for example planning and scheduling apps like todoist (todoist.com) and Trello (trello.com). Encourage your child to do their research before downloading a paid-for app. Also encourage your child to ‘declutter’ their devices often to avoid sluggish operating systems and a screen full of apps that aren’t being used. Again, caution your child against divulging private information when using apps.

Every family is different. Some are more comfortable with the idea of the Internet as a source of information, while others are still concerned about their children using it unsupervised. The rules and limits you set are up to you and your family. Bear in mind that you have an opportunity to shape your child’s approach to the Internet and their online presence, and that is something that should not be taken lightly.

Tips for kinaesthetic learners

This is the last post in a three-part series, where we explore study techniques for the three main learning styles. If you aren’t sure what your unique learning style is, click here to find out. If you are a visual learner, click here for study techniques to suit that learning style. And if you are an auditory learner, click here.

So you’ve done the quiz and you’ve figured out that you have a kinaesthetic learning style.

To recap: People with a kinaesthetic learning style learn best when they are able to manipulate, engage with or actually do the thing that they’re learning about. If you find that you’re unable to fully grasp content unless you can touch and explore it, then you’re probably a kinaesthetic learner.

Here are some study techniques that you could try. These techniques help kinaesthetic learners to make sense of content and concepts by making sure that your brain engages with information in a way that it can process.

Do something while you study

Because you are easily distracted, it’s a good idea to do something while you’re studying. Fidget spinners are the latest trend but a good old-fashioned stress ball or simple elastic band will also do the trick. You could also take your notes to the gym, and try to get some studying in while you’re walking on the treadmill. You could also just pace up-and-down wherever you are studying.

The point is that your attention needs to be on your study notes, so calm your inner fidget by giving it something to do while your brain focuses on the important stuff!

Practise HIST (High Intensity Study Intervals)

Because you are easily distracted, it’s no use trying to get a straight four hours of studying in. You will only end up frustrated. Rather study in short but effective bursts. This gives you an opportunity to focus on the task at hand, knowing that a 5-10 minute break is coming up.

Set a timer for 25 minutes and use the 25 minutes to give your revision all of your energy and attention. Once the buzzer goes, set another timer for 5-10 minutes (no longer!). Use this time to do whatever you like – make a sandwich, make a call or take a quick swim. Then go back and do another round. Do this until you’ve hit your study target for the day.

Prepare a presentation

Pretend that you are the only person in your class that has received the study notes. It is your responsibility to teach the content and skills to the rest of your class. Prepare a presentation on what they need to know. Use any presentation aids that you choose: PowerPoint, flipcharts, flash cards, etc. The act of putting the presentation together will help to solidify the content in your mind.

Take a look at this post: Tips for auditory learners, where we discuss putting together a study club. A study club is the perfect audience for a presentation like this. And, best of all, you’ll be helping learners with different learning styles (like an auditory learning style) at the same time too!

Watch videos and tutorials online

Long written descriptions will probably bore you, and you will end up not fully grasping complex content and concepts. Use YouTube and other reputable educational websites to find explanatory videos. This will go a long way to helping you decode the content.

It is also a good idea to look for online tutorials on DIY projects. This method won’t necessarily suit all of your subjects but you may be surprised how many fun and interesting projects there are online to help you with your learning. An example might be to build a DNA model to help you understand the helix structure (Life Sciences).

Here is a good example of this type of project: http://www.wikihow.com/Make-a-Model-of-DNA-Using-Common-Materials

(We have a full post on study techniques using technology coming up on the blog so look out for that.)

Use rhythm and rhyme

(This study technique is also suitable for auditory learners.)

Mnemonics (pronounced ni-mon-iks) are a great way to remember lists of facts or information, and are ideal for kinaesthetic learners because the act of making something up yourself often makes it easier to remember. Have fun making up your own mnemonics to remember certain facts.

For example, a good way to remember the three main learning styles might be to remember this rhyme: Vuyo Kicks Ants. (V = visual, K = kinaesthetic, A = auditory)

TIP: Try not to depend on mnemonics too much as a study technique, as you may end up forgetting which mnemonic to use!

How to use your Ace it! study guide

Hopefully this post has given you some good ideas about study techniques to use when you’re a kinaesthetic learner. Don’t forget that the Ace it! study guides have all the content you need to know for your exams.

Here’s how a kinaesthetic learner can use the Ace it! study guides to their best advantage:

  • Use the practice exam questions. Practice exams are a great tool for kinaesthetic learners.
  • Prepare your own quiz based on the content in the study guide.
  • Use sticky notes to remember which mnemonic to use for which section. And sing/chant your mnemonic out loud with actions and clapping for maximum impact!

Tips for auditory learners

This is the second post in a three-part series, where we explore study techniques for the three main learning styles. If you aren’t sure what your unique learning style is, click here to find out. If you are a visual learner, click here for study techniques to suit that learning style.

So you’ve done the quiz (or read the previous blog post about different learning styles) and you’ve figured out that you have a visual learning style.

To recap: People with a visual learning style learn best when they can see what they are trying to learn. If your notes are colourful and you like to doodle in the margins, then you’re probably a visual learner.

Here are some study techniques that you could try. These techniques help visual learners to make sense of content and concepts by forming ‘pictures’ that your mind can then file away, ready to be whipped out when you need it most: in a test or exam.

Take notes in class

This might sound obvious but it’s an old school way to make sure that you remember what you’ve learnt in class. Too many people try to simply listen to what the teacher is saying, and then find that they can’t remember anything as soon as the class is over!

As a visual learner, you may also find your thoughts drifting if you try to listen without taking any notes… Taking notes is a skill: Don’t think that trying to write down every word that the teacher is saying is going to help you either. You’ll lose track and end up missing something if you try to do that.

There are five main note-taking techniques that you can use during a class:

  1. The Cornell Method: Divide your page into two columns. In the right-hand column, write down the concepts being taught. In the left-hand column, write down questions or cues relating to the content. This forces you to engage with the subject matter.
  2. Outlining method: Use bullet points or indenting to show the main themes, and then the sub-themes under each main theme.
  3. Flow method: This is a freestyle method where you simply take notes in whatever format feels best to you at the time. You can use arrows, stars and pictures in this method to connect ideas and concepts.

Here are two excellent YouTube videos about note-taking skills. The first explains the three main methods, and how to use them, and the second shows you how to make your notes colourful and exciting to look at and use (perfect for visual learners!):

TIP: If your teacher doesn’t approve of note-taking during class (we all have a teacher who says “You don’t need to write, it’s all in the hand out”), try speaking to him or her about it after class one day. Show your teacher the kind of notes that you would like to take, and explain that you think that you’ll be able to grasp the content much better if you’re allowed to write notes during the class. If your teacher is still unsure, then try to write as many notes as possible in the time between classes or straight after school.

Mind maps

There’s nothing new about mind maps. It’s a study technique that’s been around for ages, and you’ve probably seen them before. Perhaps a teacher or adult has even tried to teach you how they create mind maps. Whether you’re a mind map expert or a mind map novice, this much is true: Mind maps are a visual learner’s best friends.

The trick with mind maps is to only include the most important information (so don’t try to include everything in your History textbook). Mind maps should be as colourful (or not) as you want them to be. Use highlighters, different colour pens, wax crayons, pencil crayons and sticky notes to really make them stand out. You can also use pictures to really solidify concepts or ideas in your mind – either draw them yourself, or cut-and-paste pictures and articles from newspapers, magazines and the Internet.

If you’re worried about running out of space, try to get hold of A3 sheets of paper. You can even use sticky-tape to make a bigger sheet of paper from four A4 sheets.

(We have a full post on creating mind maps coming up on the blog so look out for that.)

Look for pictures, demos or videos in the library and online

Are you excited when you turn a page of your textbook in the middle of a complicated section and see an annotated diagram because, finally, you’ll be able to understand what all those explanations are about? It’s pretty obvious that if you’re a visual learner you’ll need to actually see something before you fully understand it.

Unfortunately, you may not always have a picture, photograph or video in your textbook or learning materials to explain everything. And, even if there are pictures, they may not be clear enough for you to really get it.

This is where the Internet and your school’s library will come in handy. You’ll be able to find illustrations and photographs, and even videos in some cases, for almost anything.

So when your textbook describes a Blue Crane as a tall, ground-dwelling bird that is about 120 cm tall with a wingspan of about 200 cm, look it up! You’ll get a much better idea of what a Blue Crane is when you actually see a picture of it. Better yet, search for a video on YouTube, where you can see the Blue Crane walk and hear its call.

Just be careful while you’re online – be smart and stay safe. And only trust reputable websites because not everything on the Internet is true.

(We have a full post on study techniques using technology coming up on the blog so look out for that.)

How to use your Ace it! study guide

Hopefully this post has given you some good ideas about study techniques to use when you’re a visual learner. Don’t forget that the Ace it! study guides have all the content you need to know for your exams.

Here’s how a visual learner can use the Ace it! study guides to their best advantage:

  • Use highlighters to highlight key concepts.
  • Take notes in the margins.
  • Use sticky notes to mark off sections, or to write notes for yourself.
  • Ace it! study guides are logically organised and broken into sections. Translate each section into mind maps or charts to revise what you need to know.

If you’re an auditory learner, then look out for our next blog post.


Tips for visual learners

This is the first post in a three-part series, where we explore study techniques for the three main learning styles. If you aren’t sure what your unique learning style is, click here to find out.

So you’ve done the quiz (or read the previous blog post about different learning styles) and you’ve figured out that you have a visual learning style.

To recap: People with a visual learning style learn best when they can see what they are trying to learn. If your notes are colourful and you like to doodle in the margins, then you’re probably a visual learner.

Here are some study techniques that you could try. These techniques help visual learners to make sense of content and concepts by forming ‘pictures’ that your mind can then file away, ready to be whipped out when you need it most: in a test or exam.

Take notes in class

This might sound obvious but it’s an old school way to make sure that you remember what you’ve learnt in class. Too many people try to simply listen to what the teacher is saying, and then find that they can’t remember anything as soon as the class is over!

As a visual learner, you may also find your thoughts drifting if you try to listen without taking any notes… Taking notes is a skill: Don’t think that trying to write down every word that the teacher is saying is going to help you either. You’ll lose track and end up missing something if you try to do that.

There are five main note-taking techniques that you can use during a class:

  1. The Cornell Method: Divide your page into two columns. In the right-hand column, write down the concepts being taught. In the left-hand column, write down questions or cues relating to the content. This forces you to engage with the subject matter.
  2. Outlining method: Use bullet points or indenting to show the main themes, and then the sub-themes under each main theme.
  3. Flow method: This is a freestyle method where you simply take notes in whatever format feels best to you at the time. You can use arrows, stars and pictures in this method to connect ideas and concepts.

Here are two excellent YouTube videos about note-taking skills. The first explains the three main methods, and how to use them, and the second shows you how to make your notes colourful and exciting to look at and use (perfect for visual learners!):

https://youtu.be/sJCVeV2eIzU

TIP: If your teacher doesn’t approve of note-taking during class (we all have a teacher who says “You don’t need to write, it’s all in the hand out”), try speaking to him or her about it after class one day. Show your teacher the kind of notes that you would like to take, and explain that you think that you’ll be able to grasp the content much better if you’re allowed to write notes during the class. If your teacher is still unsure, then try to write as many notes as possible in the time between classes or straight after school.

Mind maps

There’s nothing new about mind maps. It’s a study technique that’s been around for ages, and you’ve probably seen them before. Perhaps a teacher or adult has even tried to teach you how they create mind maps. Whether you’re a mind map expert or a mind map novice, this much is true: Mind maps are a visual learner’s best friends.

The trick with mind maps is to only include the most important information (so don’t try to include everything in your History textbook). Mind maps should be as colourful (or not) as you want them to be. Use highlighters, different colour pens, wax crayons, pencil crayons and sticky notes to really make them stand out. You can also use pictures to really solidify concepts or ideas in your mind – either draw them yourself, or cut-and-paste pictures and articles from newspapers, magazines and the Internet.

If you’re worried about running out of space, try to get hold of A3 sheets of paper. You can even use sticky-tape to make a bigger sheet of paper from four A4 sheets.

(We have a full post on creating mind maps coming up on the blog so look out for that.)

Look for pictures, demos or videos in the library and online

Are you excited when you turn a page of your textbook in the middle of a complicated section and see an annotated diagram because, finally, you’ll be able to understand what all those explanations are about? It’s pretty obvious that if you’re a visual learner you’ll need to actually see something before you fully understand it.

Unfortunately, you may not always have a picture, photograph or video in your textbook or learning materials to explain everything. And, even if there are pictures, they may not be clear enough for you to really get it.

This is where the Internet and your school’s library will come in handy. You’ll be able to find illustrations and photographs, and even videos in some cases, for almost anything.

So when your textbook describes a Blue Crane as a tall, ground-dwelling bird that is about 120 cm tall with a wingspan of about 200 cm, look it up! You’ll get a much better idea of what a Blue Crane is when you actually see a picture of it. Better yet, search for a video on YouTube, where you can see the Blue Crane walk and hear its call.

Just be careful while you’re online – be smart and stay safe. And only trust reputable websites because not everything on the Internet is true.

(We have a full post on study techniques using technology coming up on the blog so look out for that.)

How to use your Ace it! study guide

Hopefully this post has given you some good ideas about study techniques to use when you’re a visual learner. Don’t forget that the Ace it! study guides have all the content you need to know for your exams.

Here’s how a visual learner can use the Ace it! study guides to their best advantage:

  • Use highlighters to highlight key concepts.
  • Take notes in the margins.
  • Use sticky notes to mark off sections, or to write notes for yourself.
  • Ace it! study guides are logically organised and broken into sections. Translate each section into mind maps or charts to revise what you need to know.

If you’re an auditory learner, then look out for our next blog post.

What’s your learning style?

Some people love pineapple on their pizza, while others can’t stand the thought. Some people like hip-hop, while others prefer pop music. Boxers or briefs; bikinis or a one-piece; Marvel or DC Comics… why is it that we accept people’s differences in almost every aspect of life, and yet think that every high school kid learns and studies the same way?

We’re all wired differently, so it’s no surprise that we have different learning styles. Here’s a secret: if you can figure out your unique learning style, you’ll be able to learn better, study smarter and do better in your exams.

Your teachers might not have the time to adapt how they teach to suit every single person in the class but, if you know your own learning style, you can empower yourself to revise the content in a way that makes sense to you.

More efficient revision = Better grasp of the content = Easier studying sessions = Better exam results!

Take a look at the three main learning styles below, and try to figure out which describes you best. If you’re not sure which you are, try to work it out by deciding which study technique you prefer. If you still can’t work it out, there’s a handy quiz in every Ace it! study guide.

The auditory learning style

If you are an auditory learner, you probably learn best when you hear what you are trying to learn. You’re the kind of person who actually listens in class, and remembers what the teacher has said. You’re also the kind of person who talks to yourself (we’re not judging) and reads things out loud when you’re trying to understand them.

Recommended study technique: Reciting study materials.

The visual learning style

If you prefer using a map to following written instructions or if you have a pencil case full of highlighters, you’re probably a visual learner. In order to understand something, you need to see it or observe it. You prefer using colourful charts, pictures or diagrams to study. You also prefer to use visual aids when you’re giving a presentation.

Recommended study technique: Mind mapping and highlighting key facts.

The kinaesthetic learning style

Let’s break down the word ‘kinaesthetic’:  kinetic, as in movement and aesthetic, as in the senses. You need physical experiences to help you make sense of new information. You’re probably fidgety in class and wish that teachers would let you do, rather than just telling you. If you’re really interested in a subject, you can learn more about it in two hours of doing, fiddling, interacting, researching and exploring than a teacher can tell you in a week of classes.

Recommended study technique: Role-playing or model building.

Remember that you can be a combination of two or three of these learning styles and that it might change depending on the subject. So, you might prefer a visual study technique for most subjects but kinaesthetic study techniques for Technology or Physical Sciences. You just have to try to understand yourself better so that you can do better.

Once you know your learning style, you’ll be ready to ace your exams!

Learners need help, not luck.

A collective groan will almost be heard across the country, when high school learners start their exam prep this year. The exam period can be a stressful and exhausting time for all learners, whether they are studious, fidgety, the class clown or the kid at the back of the crowded classroom.

“For most learners, exam prep is a good way to find out what you don’t know!” says Mrs Khumalo, parent and teacher from Umlazi, KZN. “Because it’s impossible for teachers to cater to every individual’s learning style, learners have to take things into their own hands at some point – there will always be revision to do.”

Learning styles refers to the way in which people absorb and learn new ideas, content and skills. In an ideal world, everyone would learn the same way, and certainly the outdated “chalk-and-talk” method of teaching that is favoured in most countries caters to this ideal. However, the reality is that people have different ways of learning. Sharmlla (17) from Gauteng has struggled to keep up with her classwork. “I always felt like I was a step behind the teacher and the rest of the learners,” she told us. “But then I did some research and realised that it was because I don’t learn properly when the teacher is just talking and writing things on the board. Now I squeeze a stress ball in class, and I always make sure that I’m taking notes during class –it gives me something to do, which helps me to absorb the information better.”

We hear similar sentiments over and over again from learners all over the country. That’s why we have come up with a solution: a study guide that contains all of the content and skills necessary to ace exams, with suggestions catering for individual learning styles thrown in. That way, learners can revise at their own leisure and in their own style:

If you prefer magazines to books, write words out to check your spelling and remember people’s faces but not their names, you might be a visual learner.

If you are distracted by noise, remember people’s names but not their faces and love to sing in the shower, you may be an auditory learner.

If you love crime thrillers, fidget constantly and are self-taught when it comes to using gadgets, then you may be a kinaesthetic learner.

The Ace it! study guides are available in most major subjects across Grades 8 to 12, and they are both CAPS and IEB aligned. We’ve also made sure that they are available in both English and Afrikaans. So, no matter what textbook you currently use, Ace it! study guides can help you to revise and prepare for your exams.